
Subtotal $0.00



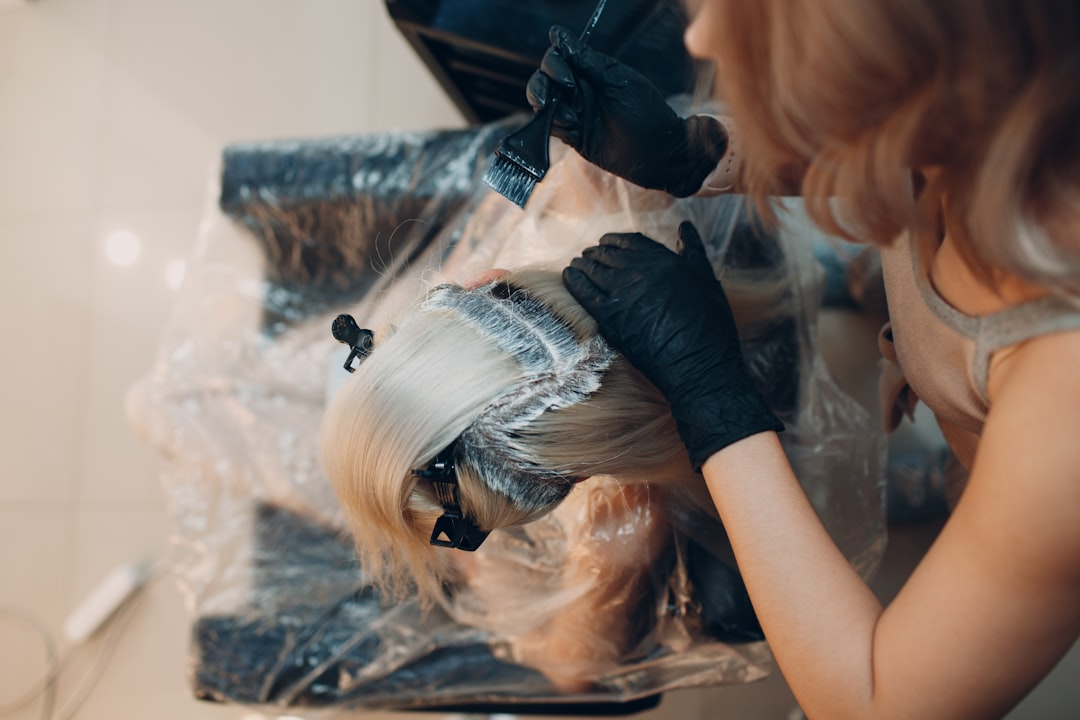
Walking into a salon consultation without knowing your hair coloring techniques — the difference between balayage and foilyage, or ombre and sombre — can leave you nodding along to a plan you don’t fully understand. This guide breaks down every major hair coloring technique, how to choose based on your hair, skin tone, and lifestyle, and what it actually takes to maintain the result once you leave the chair.
Hair Coloring Techniques: Why It Feels So Complicated
Part of the confusion comes from how the industry names things. Techniques overlap, salons use slightly different terms for the same process, and trends rebrand old techniques with new names every few years. Underneath the marketing, though, there are really only a handful of core methods, and everything else is a variation or combination of them.
Understanding the basics means you can walk into a consultation and describe what you want in terms your colorist will immediately understand — which usually means a better result and fewer surprises.
The Core Techniques
All-Over Color (Single-Process Color)
This is the simplest technique: one color applied from root to tip, either to change your natural shade entirely or to refresh faded color. It’s the fastest and usually least expensive option, and it gives the most uniform, one-dimensional result. It’s a strong choice if you want a dramatic change — going much darker or much lighter than your natural color — or if you simply want your gray fully covered with no visible regrowth line for a few weeks.
The trade-off is maintenance. Because the color is uniform, any regrowth at the roots is immediately visible, usually within 3-5 weeks depending on how fast your hair grows and how different the color is from your natural shade.
Highlights (Foils)
Highlights involve sectioning hair and applying lightener to individual pieces, usually wrapped in foil to isolate them from the rest of the hair. The foils can be placed close together for a fuller, more blended look, or more sparsely for a subtler effect.
Traditional foil highlights tend to start closer to the root, which means a more visible regrowth line compared to techniques that are hand-painted with a soft, graduated start. They’re a good option if you want a lot of visible dimension and don’t mind more frequent salon visits to maintain a crisp look.
Balayage
Balayage is a hand-painting technique where color is swept onto the hair freehand rather than sectioned into foils. The color is typically concentrated on the mid-lengths and ends, with a softer, more diffused transition at the root. This is what gives balayage its signature soft, sun-kissed look with minimal visible regrowth.
Balayage is popular precisely because of this low-maintenance quality — many people go 3-4 months between appointments, compared to the 4-6 weeks needed for traditional foil highlights. It works especially well for people who want dimension without a strict salon schedule. Book a balayage appointment to see if this low-maintenance look is right for you.
Ombre
Ombre features a more distinct, deliberate transition from a darker color at the roots to a noticeably lighter color at the ends, with the change happening over a shorter section of hair than balayage. It reads as bolder and more graphic than balayage’s soft blend.
Because the transition point is more defined, ombre can require slightly more upkeep than balayage to maintain that crisp line, though still far less than all-over color or dense foil highlights.
Sombre
Sombre (soft ombre) is essentially a toned-down version of ombre — the same root-to-tip gradient concept, but with a more gradual, subtle transition and less contrast between the starting and ending shades. It’s a good middle ground for people who like the ombre concept but want something more office-appropriate or natural-looking.
Foilyage
Foilyage combines balayage’s hand-painting technique with the added lift and precision of foils wrapped around the painted sections. This produces a more noticeable, brighter result than balayage alone while keeping some of the soft, blended quality. It’s often chosen by people who love the balayage look but want more visible lightness, especially on darker starting hair colors that need more processing power to lift.
Money Piece / Face-Framing Highlights
Rather than coloring the whole head, this technique focuses lighter pieces around the face — usually a few strands framing each side. It’s a lower-commitment, lower-cost way to brighten your overall look and can be added to natural hair color without doing a full coloring service.
Root Touch-Up / Root Smudge
This isn’t a standalone creative technique but a maintenance service — refreshing color or blending regrowth at the root without redoing the length. A root smudge specifically blends a soft shadow at the root to disguise regrowth between fuller color appointments, which is especially useful with balayage or ombre styles.
Gray Blending
For people who aren’t ready for full gray coverage but want to soften the contrast between gray and their natural color, gray blending uses lowlights and highlights to break up solid patches of gray so they blend into a salt-and-pepper look rather than standing out as a hard line. This tends to need less frequent maintenance than full gray coverage, since the goal isn’t uniform coverage.
Choosing a Technique Based on Your Priorities
If low maintenance matters most
Balayage and sombre are usually the best fit. The soft, graduated root means you can comfortably stretch appointments out for months rather than weeks.
If you want maximum brightness or a dramatic change
All-over lightening or dense foil highlights deliver the most noticeable transformation, but expect a real maintenance commitment to keep roots from becoming distracting.
If you’re coloring over gray for the first time
Many colorists recommend starting with gray blending rather than full coverage — it’s more forgiving as your hair adjusts, and less jarring if you decide you don’t love having color in your routine.
If you have a limited budget for salon visits
Techniques with soft root transitions (balayage, sombre, money pieces) stretch further between appointments, which usually works out cheaper over a year even if a single appointment costs more than a quick root touch-up.
Matching Color to Your Skin Tone
Skin tone is usually described as having warm, cool, or neutral undertones, and hair color that complements your undertone tends to look the most natural and flattering.
- Warm undertones (skin with golden, peachy, or yellow hints) generally suit warm hair colors — golden blondes, caramel, copper, and warm browns.
- Cool undertones (skin with pink, red, or bluish hints) tend to suit cooler tones — ash blonde, cool brunette shades, and colors with less orange or gold in them.
- Neutral undertones have more flexibility and can generally wear both warm and cool shades well.
A simple way to check your undertone: look at the veins on your wrist in natural light. Green-ish veins usually indicate warm undertones; blue or purple veins usually indicate cool undertones. If you can’t tell, you likely have a neutral undertone.
That said, this is a starting guideline, not a strict rule — a skilled colorist can adjust the exact shade of any technique to flatter your specific coloring, and personal preference matters more than a formula.
Damage Prevention and Aftercare
Lightening hair, in particular, is a chemical process that opens the hair cuticle and can leave hair more porous and prone to breakage if not cared for properly afterward. A few things make a real difference, as the American Academy of Dermatology also confirms:
- Use a color-safe, sulfate-free shampoo. Sulfates strip color faster and can be harsher on already-processed hair.
- Add a weekly deep conditioning treatment. Lightened hair typically needs more moisture than untreated hair to stay manageable and prevent breakage.
- Reduce heat styling frequency, or always use a heat protectant. Heat combined with color processing compounds damage.
- Space out chemical services. Combining color with another chemical process (like a perm or relaxer) too close together significantly increases the risk of damage — ask your colorist about spacing if you’re considering both.
- Get regular trims. Color makes split ends more visible and often more prone to further splitting, so trims matter even more than usual.
At-Home Color vs. Professional Color
Box dye and at-home color kits are tempting for cost and convenience, but they come with real trade-offs compared to professional coloring:
- One-size formulas: Box dye is formulated to work reasonably well across a wide range of starting hair colors, which means it’s rarely optimized for your specific hair.
- Limited technique options: Most of the techniques described above — balayage, foilyage, precise highlight placement — require hand application and professional-grade products that aren’t practical to replicate at home.
- Harder to fix mistakes: Uneven color, unexpected tones (like unwanted brassiness or green tints), and processing errors are common with at-home color and are often more expensive to correct at a salon than if you’d gone professional from the start.
At-home color can work well for simple root touch-ups on hair that’s already a single, uniform color, or temporary semi-permanent color meant to wash out. For anything involving lightening or a technique with multiple placement zones, professional application is worth the investment.
How Often to Expect Maintenance, By Technique
- All-over color: Every 3-5 weeks
- Traditional foil highlights: Every 4-8 weeks
- Balayage / sombre: Every 10-16 weeks, sometimes longer
- Ombre: Every 8-12 weeks
- Foilyage: Every 8-12 weeks
- Root touch-up / root smudge (between full services): Every 4-6 weeks
- Gray blending: Every 8-12 weeks
These are general ranges — hair growth rate, how dramatic the color change is, and how noticeable regrowth is to you personally all shift the ideal schedule.
Common Mistakes to Avoid
Going too light too fast
Jumping several shades lighter in one session, especially on dark or previously colored hair, puts significant stress on hair and increases breakage risk. Many colorists recommend a gradual approach over two or more appointments for major lightening.
Skipping the consultation
Bringing reference photos and talking through your hair’s history (previous color, chemical treatments, how it’s been damaged) helps your colorist plan a realistic result and flag anything that needs special care.
Washing hair too soon after coloring
Color needs time to fully set, and washing too soon — especially with hot water — can cause it to fade faster. Many colorists recommend waiting at least 24-72 hours before the first wash, depending on the type of color used.
Ignoring toner
Toner neutralizes unwanted brassy or yellow tones after lightening and is often what separates a flat, brassy result from a polished, cool-toned finish. It fades faster than the underlying color, so a purple or blue shampoo between salon visits helps maintain it.
Choosing a technique based on trends alone
A technique that looks stunning on someone else’s hair texture, length, and starting color might not translate the same way on yours. Discuss with your colorist which specific technique achieves the look you want on your actual hair, rather than requesting a technique by name without context.
Frequently Asked Questions
Can I go from balayage back to all-over color?
Yes — a colorist can blend balayage back into a uniform shade, though it may take more than one session depending on how much lightened hair needs to be toned or covered.
Does hair color damage hair permanently?
Coloring changes the hair’s structure and can make it more porous, but with good aftercare — deep conditioning, gentle products, regular trims — most damage from coloring is manageable and grows out over time as new, unprocessed hair comes in.
How do I know if a technique will suit my hair length?
Techniques like balayage and ombre generally need enough length to show the gradient effect — they can look less impactful on very short hair. Highlights and money pieces tend to translate well across most lengths. A consultation is the best way to get a realistic preview specific to your hair.
Is toner a separate cost from the coloring service?
This varies by salon — some include toner in the price of a color service, others charge separately. It’s worth asking directly when booking so there are no surprises.
A Brief History of Hair Coloring Techniques
Hair coloring has existed in some form for thousands of years — ancient civilizations used plant-based dyes like henna for both color and hair conditioning. What’s changed dramatically is precision and predictability. Early at-home and salon color in the mid-20th century was almost exclusively all-over, single-process color, which is part of why regrowth lines and “box dye look” became such a recognizable aesthetic.
Foil highlighting became mainstream in the 1980s and 90s, giving colorists a way to create dimension rather than flat, uniform color. Balayage, despite feeling like a modern trend, actually originated decades earlier in France (the word itself means “to sweep” in French) but only became widely popular in English-speaking markets more recently as colorists refined the technique for a broader range of hair types and as low-maintenance color became more desirable. Ombre followed a similar path — bold and graphic when it first trended, then softened over time into variations like sombre as tastes shifted toward more natural-looking results.
Understanding this history helps explain why so many techniques exist and overlap: each one emerged to solve a specific limitation of the technique before it, whether that was visible regrowth, harsh contrast, or lack of natural-looking dimension.
How Hair Porosity Affects Your Color Result
Porosity — how easily your hair absorbs and holds moisture — has a big impact on how color takes and how long it lasts, and it’s a factor many people have never considered before a coloring appointment.
Low porosity hair
Low porosity hair has a tightly bound cuticle that resists letting color molecules in. This type of hair often needs more processing time to achieve the desired result and can sometimes end up with color that sits more on the surface, fading faster than expected. Heat during processing can help open the cuticle enough for better color absorption.
High porosity hair
High porosity hair — often a result of previous chemical treatments, heat damage, or naturally has a more open cuticle structure — absorbs color quickly, sometimes too quickly, which can lead to color turning out darker or more intense than intended, or fading unevenly. This type of hair usually benefits from a gentler formula and shorter processing time.
A simple porosity test
Drop a clean strand of hair (from your brush, not straight from your head) into a glass of water. Hair that floats for a while indicates low porosity; hair that sinks quickly indicates high porosity. This isn’t a lab-grade test, but it gives a useful general sense of what your colorist is working with, and it’s worth mentioning if you know your hair tends toward one extreme.
Considerations for Textured and Curly Hair
Color processes differently on curly and coily hair textures compared to straight hair, and not every salon or colorist has equal experience across all textures. A few things worth knowing:
- Curl pattern can affect how lightener grabs the hair. Curlier hair sometimes needs adjusted timing compared to straight hair of a similar starting color, since the hair’s structure affects how evenly product distributes.
- Shrinkage matters for length-based techniques. Techniques like balayage that rely on visible length for the gradient effect can look different on curly hair once it dries and shrinks compared to how it looked wet during application — a colorist experienced with curls will account for this.
- Moisture needs are often higher. Curly and coily hair types are frequently more prone to dryness even before coloring, so aftercare with extra moisture and protein balance becomes even more important post-color.
- Ask about specific experience. It’s completely reasonable to ask a colorist directly about their experience coloring your specific hair texture before booking, especially for bigger changes.
Understanding the Cost Factors Behind Hair Coloring
Salon pricing for color services varies widely by region, salon tier, and stylist experience level, so this section focuses on the factors that influence cost rather than specific price points, which you should confirm directly with any salon you’re considering.
- Hair length and thickness. More hair means more product and more time, which most salons factor into pricing.
- Number of colors or techniques combined. A single-process color costs less than a multi-step balayage-plus-toner-plus-gloss service.
- Stylist experience level. Senior colorists or salon owners often charge more than newer stylists, reflecting both skill and demand.
- Corrective color. Fixing a previous color mistake, especially color correction involving removing unwanted tones, is typically more time-intensive and priced accordingly.
- Add-ons. Toning, glossing treatments, and deep conditioning treatments are often priced separately from the base color service.
A useful practice is asking for a price range during a phone consultation or when booking online, and confirming that the quote includes toner if your desired result depends on it.
What a Good Consultation Actually Covers
A thorough consultation before a color service should cover more than just “what color do you want.” A colorist doing their job well will typically ask about:
- Your hair’s color history, including any box dye, henna, or previous professional color
- Any chemical treatments you’ve had (relaxers, perms, keratin treatments)
- Your hair’s current condition and how it’s reacted to color in the past
- How much maintenance time and budget you’re realistically working with
- Your lifestyle — swimming pool exposure, sun exposure, how often you wash your hair
- Any allergies or sensitivities to hair products
If a colorist skips most of these questions and jumps straight to mixing color, it’s worth pausing to make sure expectations are aligned before they start.
Bringing It to Your Consultation
Related Reads
The most useful thing you can do before an appointment is gather 2-3 reference photos of the general look you want, be honest about your hair’s coloring history, and be clear about how much maintenance you’re realistically willing to commit to. A good colorist will translate that into a specific technique and realistic timeline — rather than you needing to know all the technical terms yourself.
Ready to get started? Explore our Color & Highlights services, including Balayage, Full Color, and Root Touch-Up — or compare local specialists through our Boise Hair Coloring & Balayage directory.